
This quick guide describes how to manage consent in Microsoft Entra ID (formerly Azure AD) so that end users can log in with FileCap without needing an administrator each time.
Important: These settings are entirely up to the customer's tenant administrator. We cannot enforce this. If Microsoft changes classifications or default behavior in the future, (admin) consent may be required again.
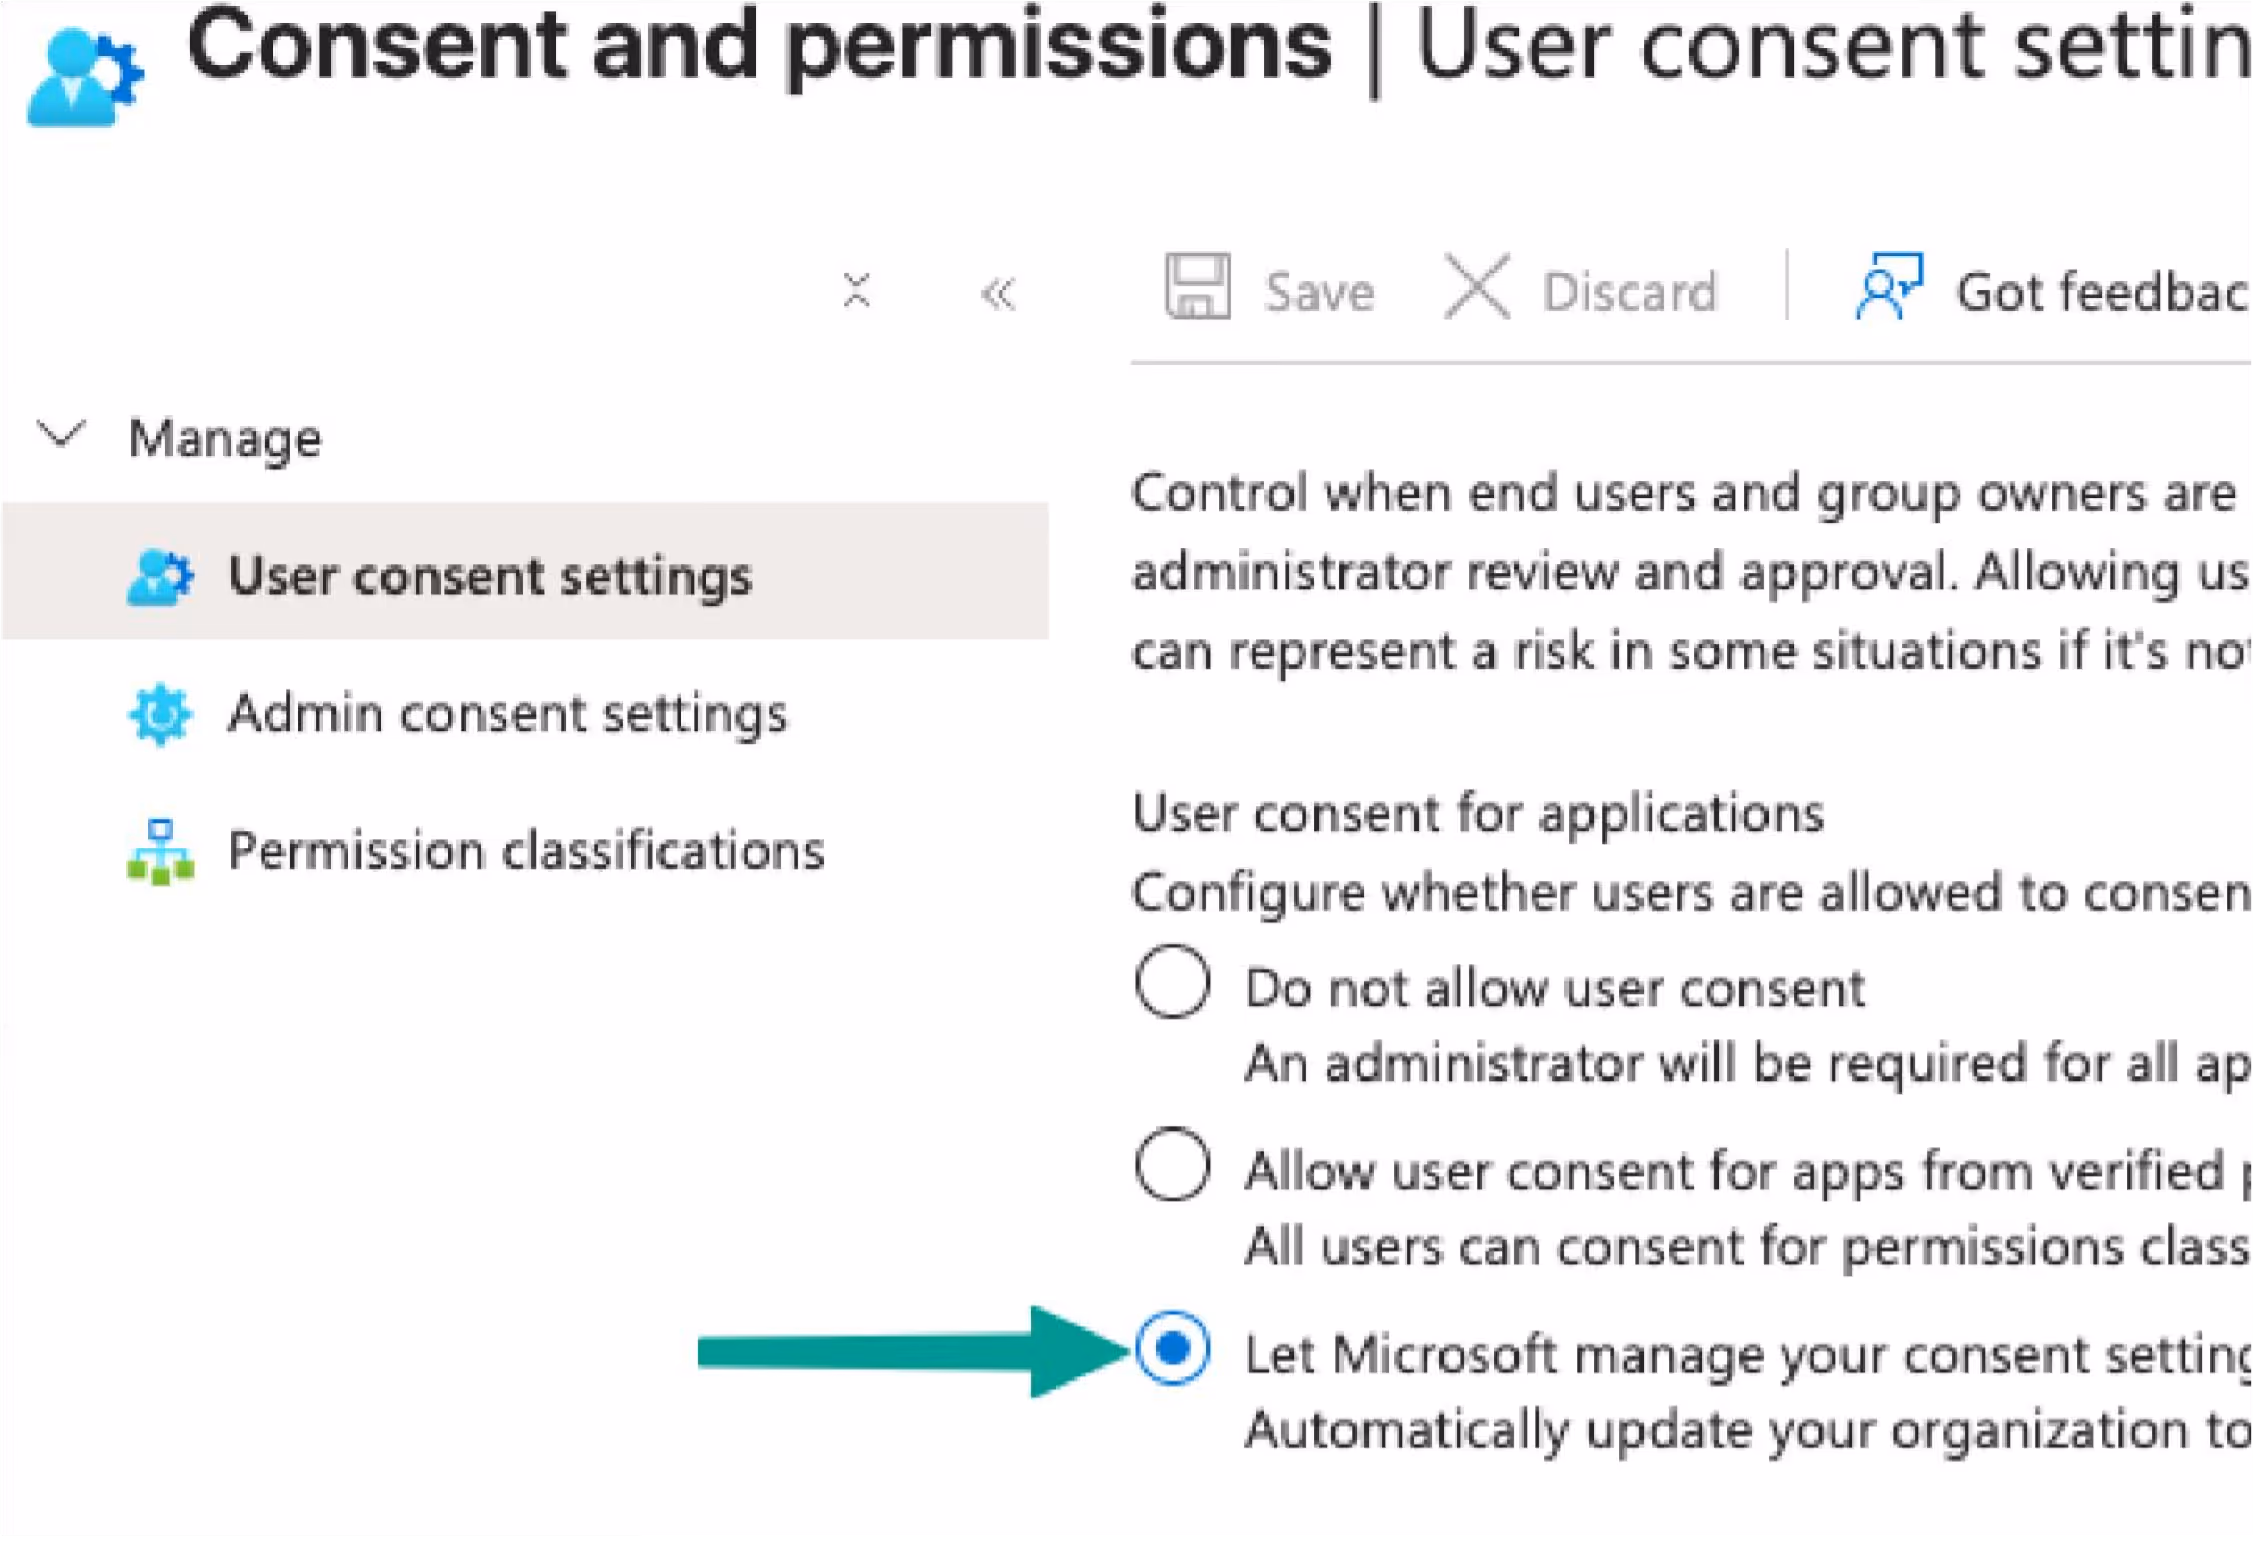
If you want to allow consent by users themselves (without opening everything), choose:
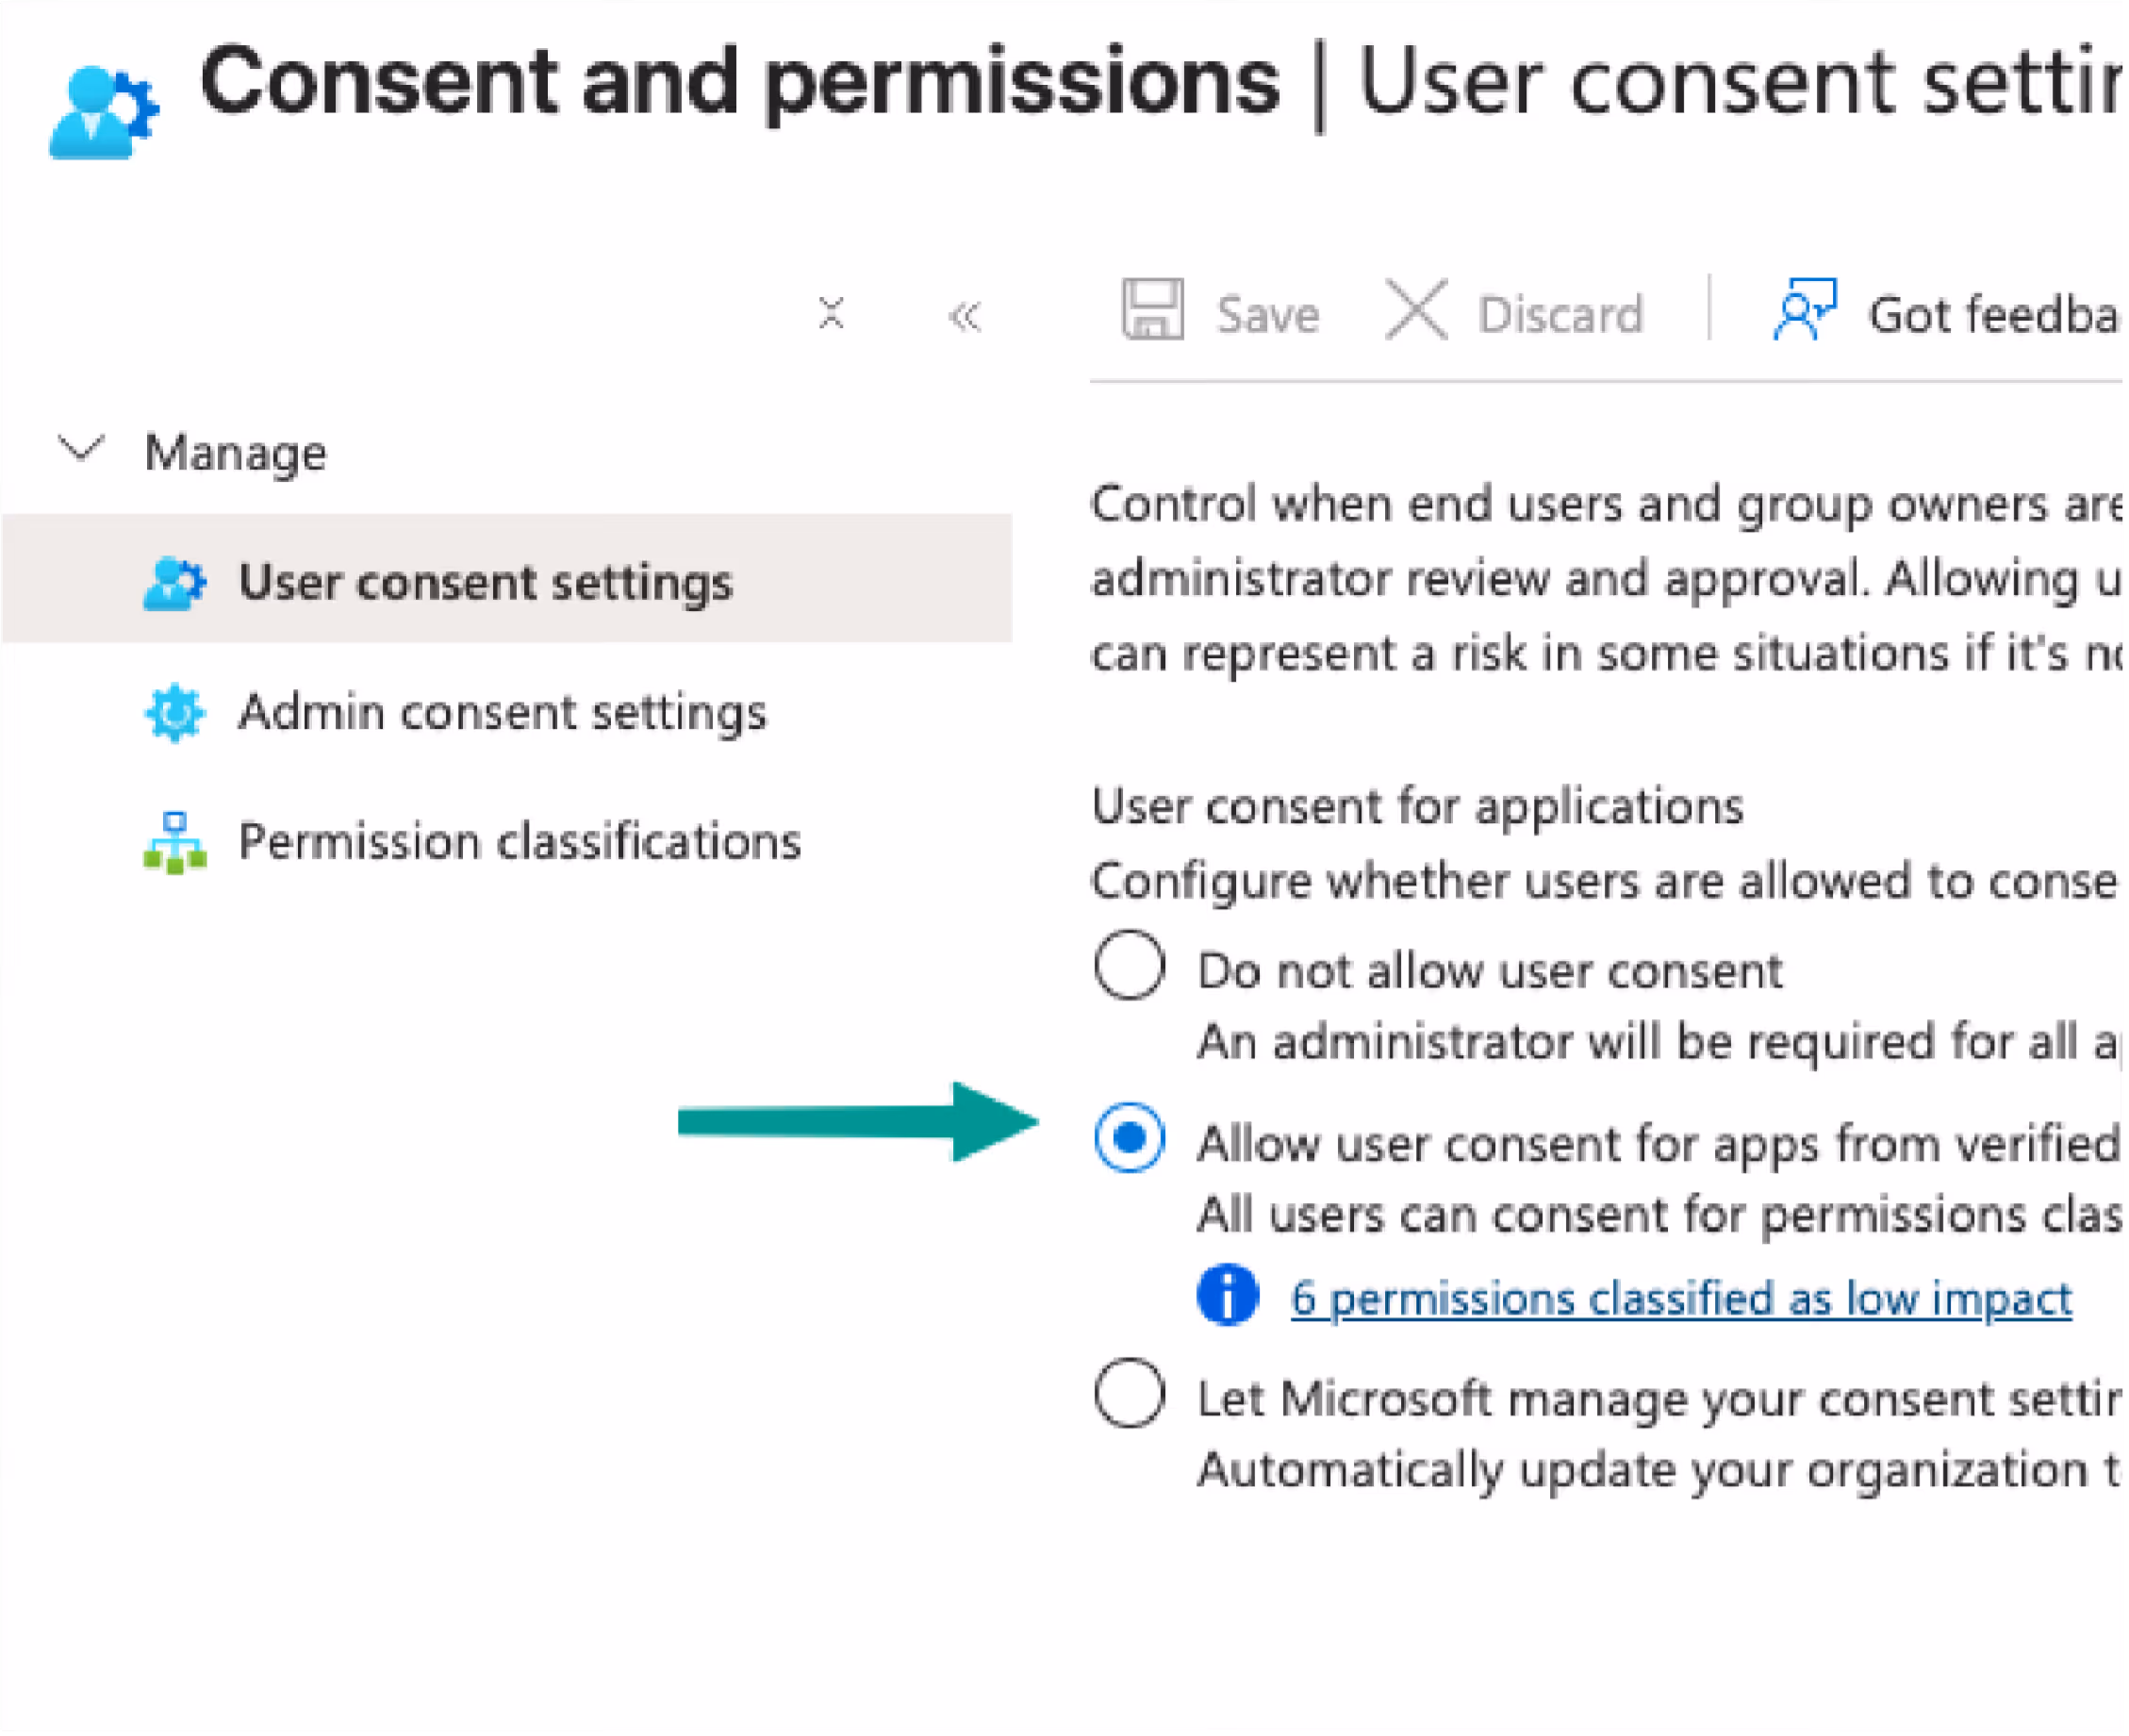
Click Save.
Figure 3 – Add the required Microsoft Graph permissions to the "Low" list.
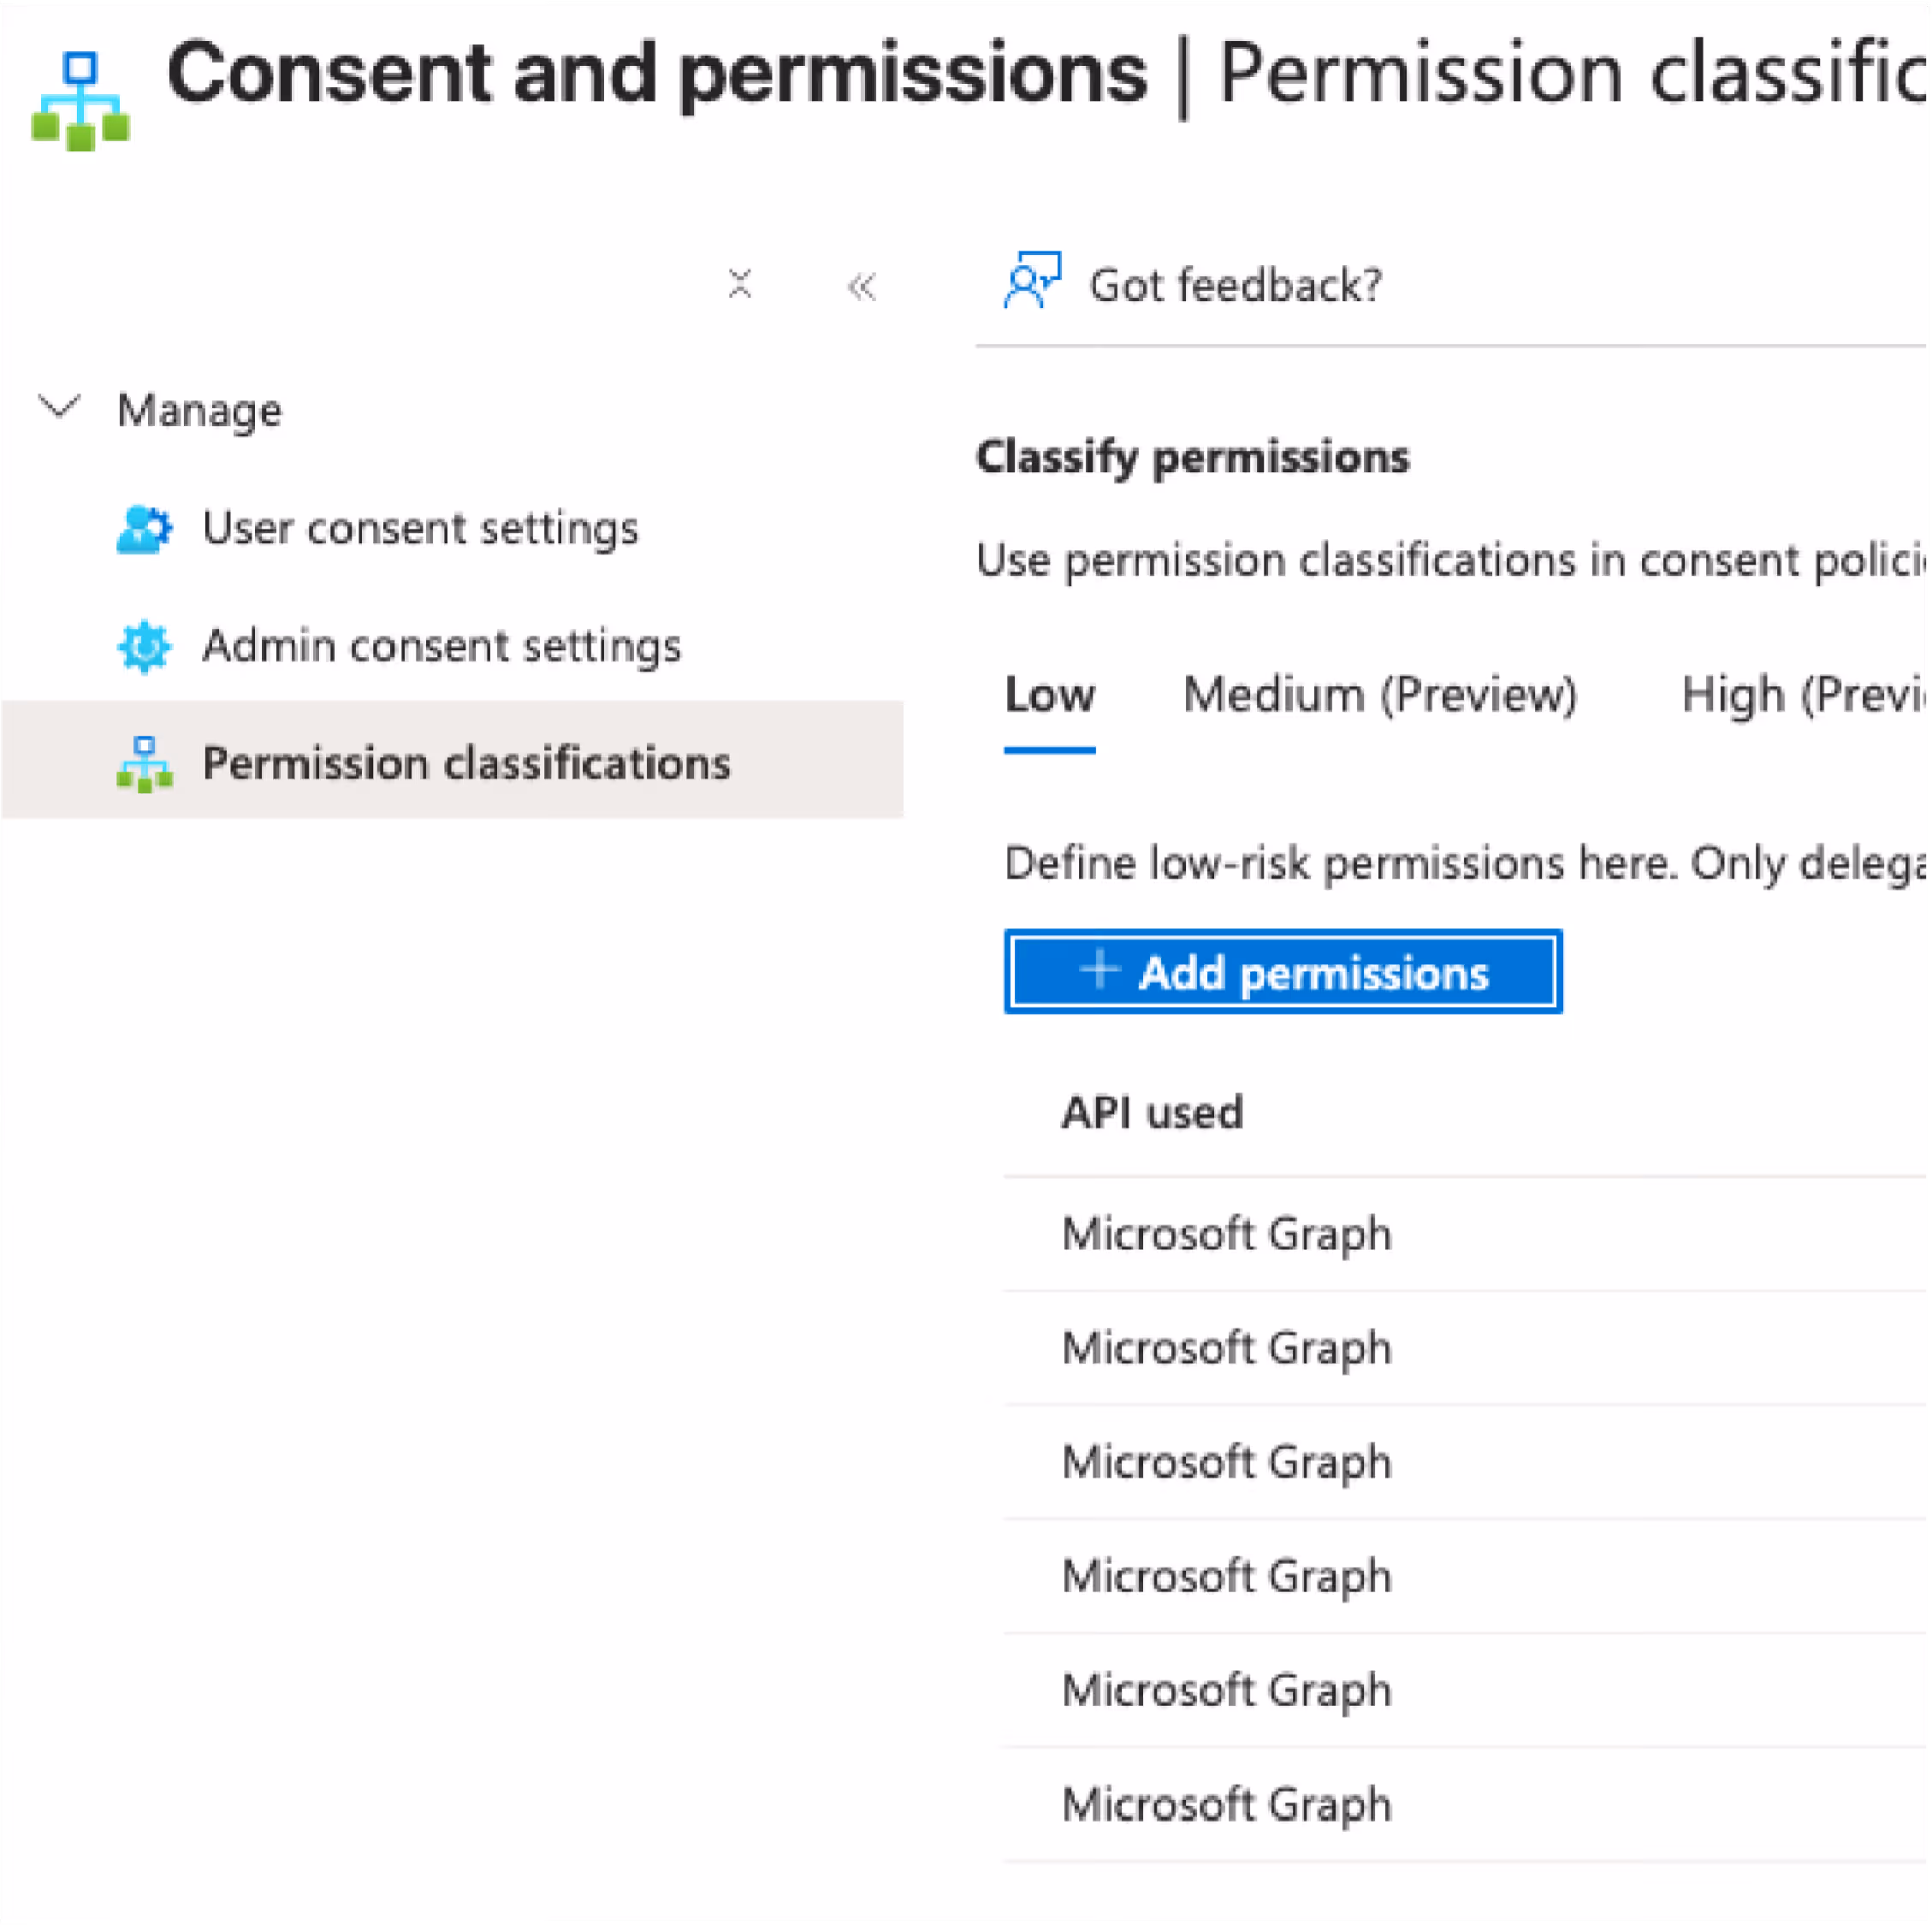
Please note: Only delegated permissions that do not require admin consent can be included in the Low list. If your policy enforces "Do not allow user consent," an administrator must still provide admin consent for the application.
Use this option when you first roll out the FileCap add-in via Integrated Apps and then explicitly grant the necessary API permissions via App Registration in Entra ID. This gives more control to administrators who do not want to allow user consent and prefer to grant admin consent in advance.
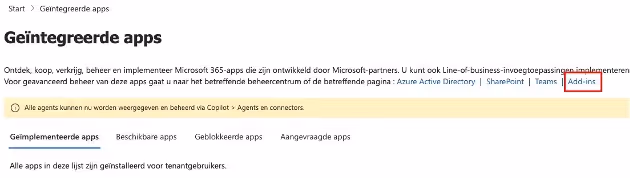
1. Deploy the FileCap add-in via Integrated Apps
Open: Microsoft 365 admin center → Settings → Integrated apps.
Select Manage Add-ins and add the FileCap add-in.
More information about the rollout can be found here: https://scribehow.com/viewer/365_add-in_uitrollen_voor_de_organisatie__EO_-LdFkRjihIUFiyKS_GQ
2. Go to FileCap's App Registration
Open: Microsoft Entra admin center → App registrations.
Search for FileCap (this is the linked application of the add-in).
Open the app → navigate to API permissions.
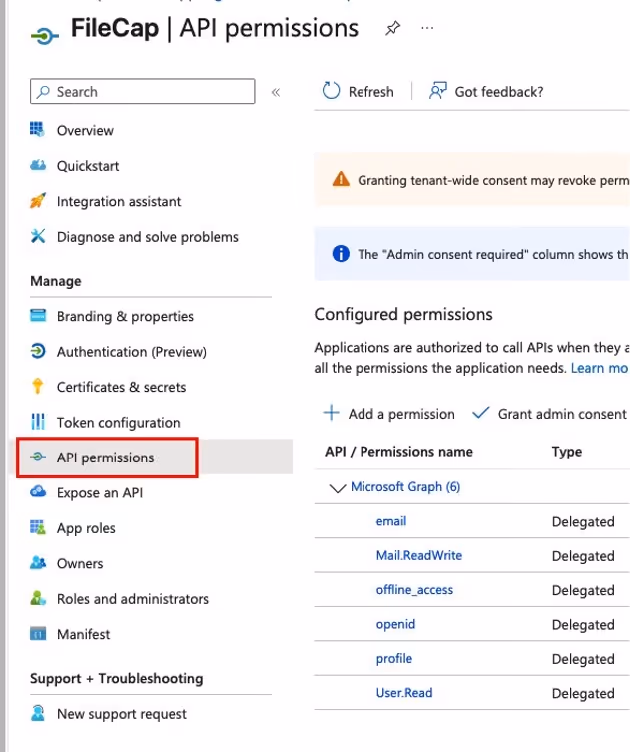
3. Add the required Microsoft Graph delegated permissions
Can you force this for us?
No. Consent policy is a tenant setting and requires a role with administrator rights at the customer.
What if Microsoft changes the classification?
Then an admin may have to grant consent again or reclassify the permission as 'Low'.
Where can I find the pages in the portal?
User consent settings: link
Permission classifications: link
Contact: If you have any questions, please contact your FileCap representative.
